


Talk Dirty to Me: Q&A with Farmer Brooke
Send your gardening, homesteading, cooking, and “green” lifestyle questions to askbrooke@ediblekansascity.com.

Brian, KCK
I have my very first garden this year. I’m wondering what things I should do in the fall to prep it for next growing season. Can you help a newbie?
Fall is a great time to prep your garden for increased success the following year. Great food is a product of great soil, so think of fall as a time to initiate some major soil-building practices for long-term benefits. Consider evolving your cultivation practices into a no-till or low-till system to improve soil structure, promote beneficial fungi, and retain moisture eliminating the need for supplemental water.
In early or late fall, once the crops are no longer producing, remove any diseased crop debris and weeds. Add a substantial amount of compost right on top of the soil. I suggest getting larger quantities of nitrogen rich compost from Missouri Organic (www.missouriorganic.com). They will deliver directly to you, or you can haul it yourself in a pick-up truck. In addition to compost you can add aged manure, either a pre-fab bagged mix or free horse manure from local stables. If you use enough compost, no manure is needed. At URBAVORE, we run our flock of laying hens directly on our vegetable fields as soon as they come out of production. The hens spread the compost around for us and provide their own fertilizer while scratching the soil and eating garden pests.
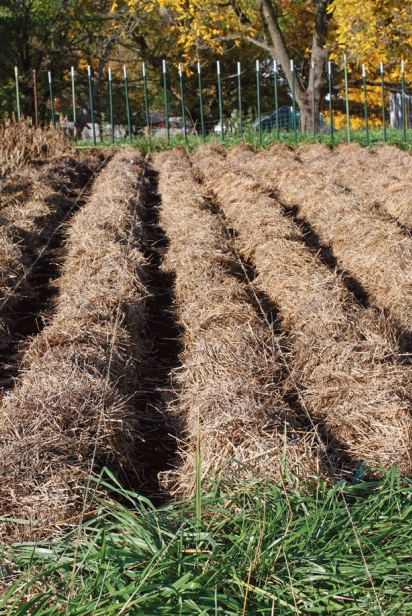
Once your field or various garden beds are adequately amended, spread a thick layer of old hay or straw. The mulch should be thick enough, about six to eight inches, to suppress weeds and hold in moisture throughout the summer months. Come spring, you can simply waltz into your garden beds and plant without tillage or tedious bed prepping. Pull back the mulch just wide enough to dig holes and drop in various garden seedlings like kale, chard, tomatoes, eggplant, peppers, etc. For those of you with particularly poor soil, additional compost can be added to each planting hole. For direct-seeded crops, pull back the mulch in entire sections, and pile it into the aisles. Then, take a garden tool and make furrows in the soil. Seed your crop, and instead of covering the seeds with soil, sprinkle compost in the furrows for enhanced germination.
Finally, when purchasing straw for mulch, make sure the farmer has not sprayed persistent herbicide or used any chemicals that might affect your vegetable seedlings. Wheat straw is preferred and should be relatively free of wheat seed if harvested with care. You can purchase sall square bales for around $4 or large round bales for bigger garden sites at around $40. The best place to find straw is on Craigslist; you can also check with KC Community Gardens for certified organic sources.
Jessica, Lee’s Summit, MO
My kids have been bugging me to start composting. I really want to do it, but I’m not sure how to go about it. I don’t have money for fancy composting equipment that I see for sale. Is there a cheap set up I can make that won’t turn into a smelly, fly-ridden mess?
Composting is so much easier and much less stinky than people think. Furthermore, no fancy equipment is needed. If you’d like to be a passive composter and not put much effort into it, all you need to do is begin making a pile of your leaves and grass clippings somewhere in the back of your backyard. Save your kitchen scraps in a bucket with a lid, and once a week go out to the pile and bury them. My Mom has been doing just that for years. She never turns the pile but every spring she digs in there, avoiding any fresh food scraps, and harvests loads of rich compost for her garden.
If you would like to be a more proactive composter, you can build a compost bin out of repurposed wooden pallets. Frequently discarded, pallets can often be picked up for nothing. This one compartment bin can be expanded upon and turned into three compartments for larger volume and easier turning. Here’s a great step-by-step link for a three compartment system: http://goodcheergarden.wordpress.com/about-2/3-bin-compost-system-using-pallets/
There is a science to layering nitrogen-rich and carbon-rich organic mater for premium compost making. However, don’t get overly intimidated by the details. Just try to incorporate some “browns” like dead leaves and straw with some “greens” like kitchen waste, grass clippings and green plant matter. After all, it is better to compost badly than not at all!
Esther, KCMO
I want to plant a fall garden this year. What are some good crops to plant this time of year?
It is a little late in the game to seed fall greens, roots, and cool weather crops. These vegetables need ample time to mature before hard frosts set in and, therefore, must be seeded earlier than one might think for success. At URBAVORE, we more or less abide by the following planting schedule for fall:
Broccoli, Cabbage, & Cauliflower – transplant healthy seedlings in late July
Beets & Carrots – seed in late July through early August
Storage Turnips & Winter Radishes – seed in early to late August
Kale, Chard & Mustard Greens – seed from August 1st to August 15th
Spinach – seed from August 1st to August 20th for fall harvest or seed anytime in the fall or winter for early spring harvest
Salad Greens, Arugula & Asian Greens – seed from August 1st to September 1st
Salad Turnips & Common Radishes – seed in early August 1st to September 10th
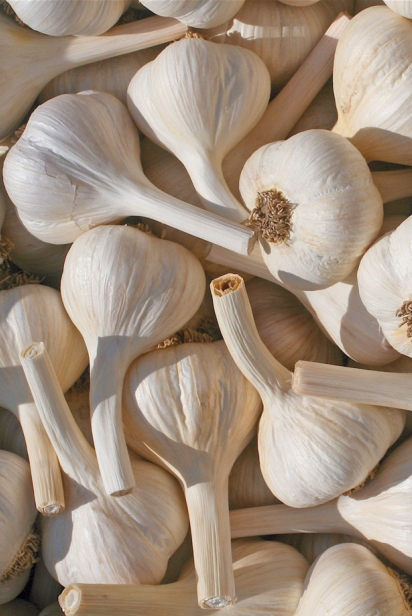
One fall planting you haven’t missed the boat on is garlic! Although you won’t reap the fruits of your labor this fall, late October is the time to plant this quintessential bulb for summer harvest. First, you must obtain seed garlic which are healthy garlic bulbs that have been grown in disease free conditions. A diversified selection can be ordered on-line from seed companies and garlic farms, but must be done so several weeks in advance. It is also possible to obtain seed garlic from reputable growers at area Farmers’ Markets. Look for large, healthy bulbs, preferably grown organically. Make sure not to purchase bulbs from a wholesaler posing as a farmer because most likely this garlic will have been treated chemically after harvest to inhibit sprouting.
The BADSEED Farmers Market will have a decent selection of organic garlic that will make for good planting stock. Once you have obtained quality seed, separate your garlic cloves, and plant root side down, two inches deep, eight inches apart in rows that are one foot apart. Garlic, like most crops, enjoys rich soil, so add plenty of compost. Mulch your garlic liberally with herbicide free straw or old hay. Your garlic will stay protected through the winter and push through the mulch in early spring.
Chris, Peculiar, MO
How can I organically keep out the worms that tunnel through my cabbage plants? I’ve tried the soap method and it didn’t work. I’ve loved to crock my own kraut since I was a boy, but I can’t figure out how to grow healthy cabbage without chemicals. Please help. I’m getting fermentia!
Fermentia is a very bad thing…I hope I can help! Cabbage, like most brassicas, falls prey to those evil green worms that haunt organic gardeners in their sleep. Most organic farms employ two methods for successful growth. The first is floating row cover. This translucent white fabric provides a bit of frost protection in early spring while physically keeping cabbage moths from laying eggs on your plants. Once you have planted your cabbage seedlings, immediately cover them making sure the row cover is tightly pinned on the sides using garden staples and blousy in the middle so the plants can push it up as they grow. Use an office stapler to patch any rips or holes that form throughout the weeks ahead. Uncover your plants only to weed or water if necessary. The protective fabric should remain in place until harvest. Row cover can be purchased in small quantities at Soil Service Center in KCMO or from organic farm suppliers nation- wide.
The other method is an organically approved pesticide known at Bt (Bacillus thuringiensis). It is a natural, safe microbial pesticide that kills soft-bodied insects like cabbage worms and cabbage loopers. Several applications of Bt throughout the growing season should eliminate your problem. For the record, I do not use Bt on my organic farm and prefer to use row cover exclusively. Spraying pesticides, organic or otherwise, is a less than ideal practice, so use only as a last resort. Happy kraut making!
Send your gardening, homesteading, cooking, and “green” lifestyle questions to askbrooke@ediblekansascity.com

Send your gardening, homesteading, cooking, and “green” lifestyle questions to askbrooke@ediblekansascity.com.
Copyright ©2025 Edible Kansas City. All rights reserved